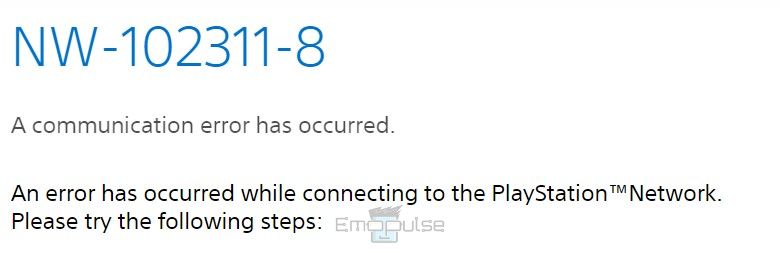
DNS Error NW-102311-8 on PS5 was reported by users on Reddit. It can occur due to issues with DNS (Domain Name System) settings or network connectivity problems.
When there is a misconfiguration in the DNS settings or a disruption in network connectivity, the PS5 console cannot correctly access the PlayStation Network, resulting in the NW-102311-8 error. So, some of the reasons that can lead to cause the DNS NW-102311-8 error are:
- Misconfiguration In DNS Settings
- Network Connectivity Problems
You will see the following screen with the message:
“A communication error has occurred.”
Key Takeaways
- The error indicates a network issue.
- It can occur due to misconfigured DNS settings or network connectivity issues.
- Manually adjusting the DNS settings on your PS5 can help resolve this issue, among other fixes.
NOTE: By restarting your PS5, practically all common issues can be resolved. If you’ve previously tried that and it doesn’t seem to be fixing the problem, try rebooting your internet router to see if it helps. If these do not work, move on with the following fixes!
1. Check The Status Of The PlayStation Network.
Like many other network errors, I’ve found server problems to play a role in this one as well. Whenever faced with a network error, I’ve tested that half the time, simply checking PSN status saves you a lot of time and effort. If the servers are down, there’s not much to do except be patient.
If the servers are well and functioning, however, move on to the other fixes!
2. Change The DNS Settings On Your Console
Your PS4 will use your ISP’s default DNS servers while it is set to Automatic; these servers may be unavailable, which may be why you are receiving this error.
You can work around this issue and regain access to the internet by switching your DNS servers to a new pair, such as Google DNS or another free provider. I’ve used this to fix the error on my console, and PlayStation Support recommends it as well!
Here’s how you can do it:
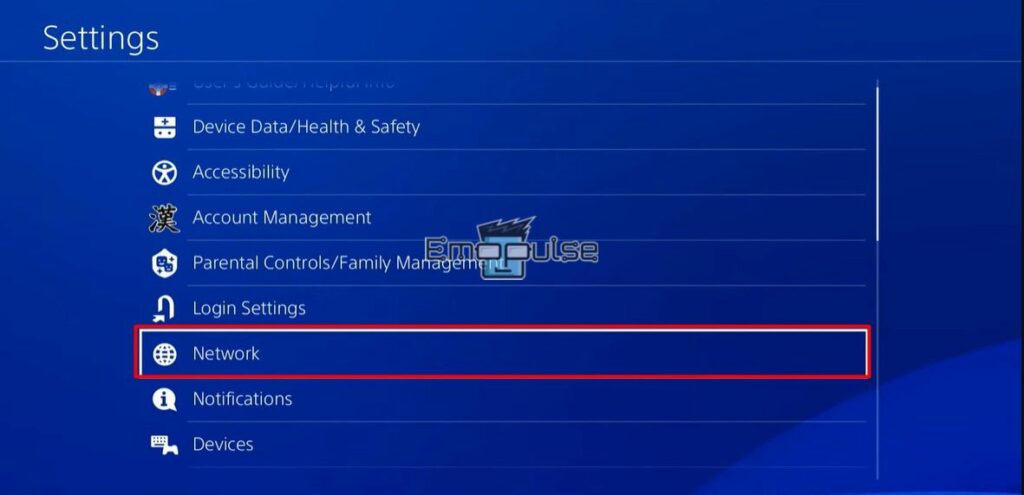
- Go to Settings > Network.

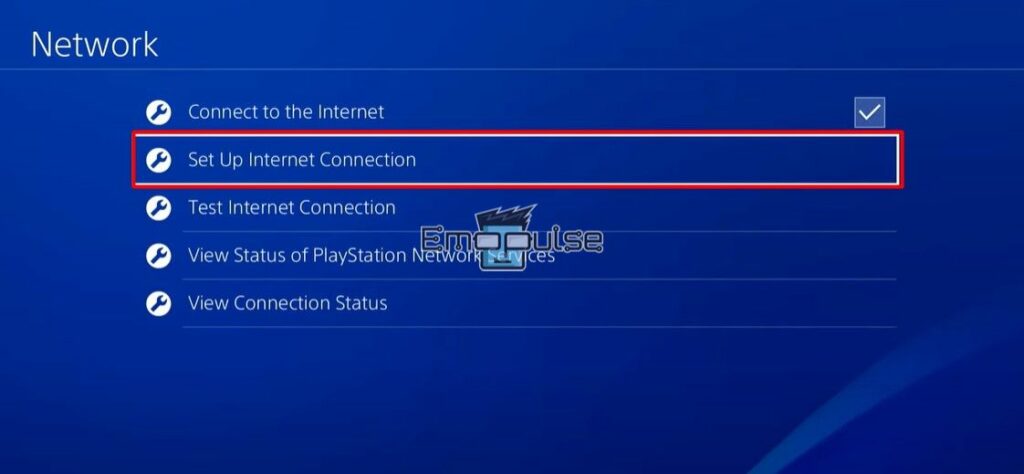
Network – Image Credits (Emopulse) - Select Set Up Internet Connection.

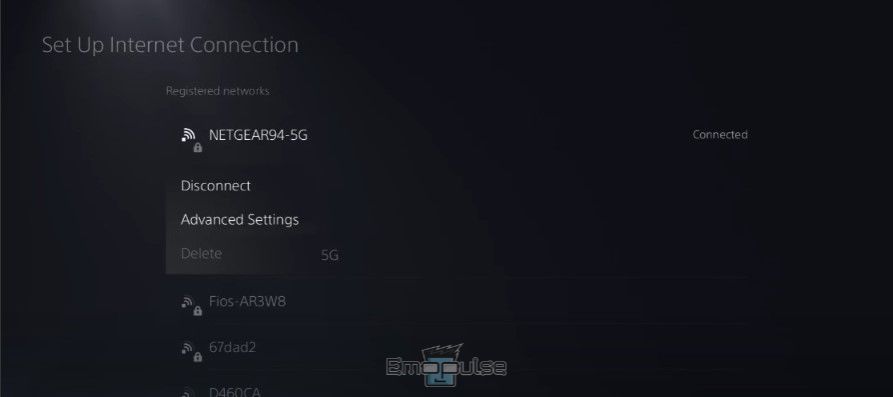
Set Up Internet Connection – Image Credits (Emopulse) - Locate the network you are connected to and select it
- Instead of selecting automatic, click the settings button on your PS5 controller and choose either 5 GHz or 2.4 GHz.

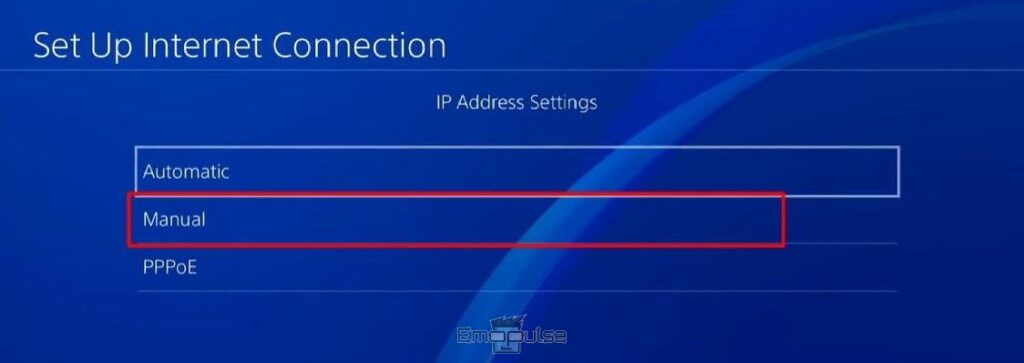
Change Bandwidth – Image Credits (Emopulse) - Afterward, choose Advanced Settings > DNS Settings > choose Manual.

Manual – Image Credits (Emopulse) - Your Primary DNS and Secondary DNS will appear.

Primary DNS – Image Credits (Emopulse) - In the Primary DNS field, put in “8.8.8.8”.
- Put “8.8.4.4” under the Secondary DNS field.
- Click the OK option on the right after that. Wait for your PS5 to perform a network test.

After finishing, you should verify that the error has been corrected.
3. Disable Your Internet Router’s Firewalls Temporarily
From my testing, it seems like firewall interactions can also cause this error. Copying the IP address found on your router will allow you to connect to it. Alternatively, connect your PS5 or another computer straight to the router.
You may need to contact your ISP to ask them to turn off any ISP services you may be using, such as Parental Control, which may restrict incoming connections.
Here are the general guidelines for momentarily turning off the firewall on your router.
- Access the settings page of your router.
- Type the IP address on the router into your browser and click enter.
- To log in, you might need a username and password. These login credentials should be on your router or were given to you by your ISP when you installed the device.
- Look for terms like “Firewall,” “Security,” “WAN Settings,” and other similar words on the menu page.
- In the menu page, look for terms like “Firewall,” “Security,” “WAN Settings,” “Filter,” or “Packet check.” Depending on your router, the actual setting name may vary.
- Turn off the firewall after finding the appropriate setting.
- To ensure that the connection works as intended, check your PS5.
4. Update The System Software
You can also attempt to update the system software to fix this error if none of the preceding fixes are successful. Our team had a very high rate of success when updating the system offline, so give that a try!
5. Clearing DNS Cache
I also tried clearing the cache in order to fix the issue, and it worked remarkably well. It’s a very easy fix that works for a number of errors. This is because sometimes the DNS servers aren’t at fault, but your own console’s cache is overloading them.
Follow the following steps:
- Navigate to the top menu and select the Settings > Network.
Network – Image Credits (Emopulse) - Under the Network settings, select Settings > Advanced Settings > DNS Settings > choose Clear Cache.
- Confirm the change, and restart your console.
6. Contact PlayStation Support
If you’ve attempted the solutions above and the DNS error still doesn’t appear to be fixed. We advise getting in contact with PlayStation’s official support. They will be able to identify your particular problem and provide suggestions for resolving it.
The Verdict
The issue itself is purely associated with the DNS, as per the name. As such, treating it is usually enough to fend off the error. The only times when our team could not do so were when the PSN servers were down and when we intentionally tried using a slow internet when treating the error.
I’ve also found that users who once suffered from the error could prevent it from happening by simply clearing the DNS cache and getting a better connection, so see if doing that is possible for you.
You might also face these:
Frequently Asked Questions
How do I fix a DNS error on PS5?
You can try the following methods to resolve a DNS error:
-Reload the system settings and clear the DNS cache.
- Verify the DNS server is operating properly and the network connection.
-Refresh the software on your console device.
How can I restore the default DNS settings of my PS5?
Using a DNS management tool like NetworkManager or DDNS Client will allow you to reset your DNS settings back to their default setting.
Good job! Please give your positive feedback
How could we improve this post? Please Help us.