Smooth online experiences are a crucial part of modern gaming and web browsing. However, even the most advanced systems can run into connectivity issues due to Domain Name System (DNS) errors. These errors can cause slow loading times, connection drops, and frustration.
Fortunately, changing DNS settings on your PC and Xbox can often resolve these issues, improving your online experience. In this guide, I will guide you through the step-by-step process of changing the DNS server on PC and Xbox, ensuring you’re back in action without a hitch.
Key Takeaways
- Access network settings through different interfaces on PC and Xbox.
- Modify DNS settings under network properties for both devices.
- Opt for well-known DNS servers like Google DNS or OpenDNS.
Changing DNS on your PC and Xbox is a simple yet powerful solution to network-related issues. Whether you’re facing slow loading times or intermittent connectivity problems, adjusting your DNS settings can significantly enhance your online experience.
Let’s delve into the comprehensive step-by-step procedure for altering DNS settings on both your PC and Xbox:
Changing DNS Settings On PC
Here is a precise method I used to change the DNS settings on the PC:
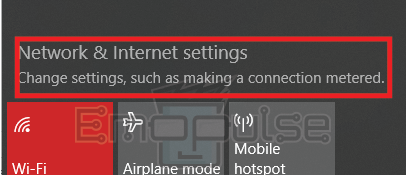
1. Navigate to your PC’s network settings. You can right-click the network icon in the taskbar on Windows and choose Open Network & Internet settings.
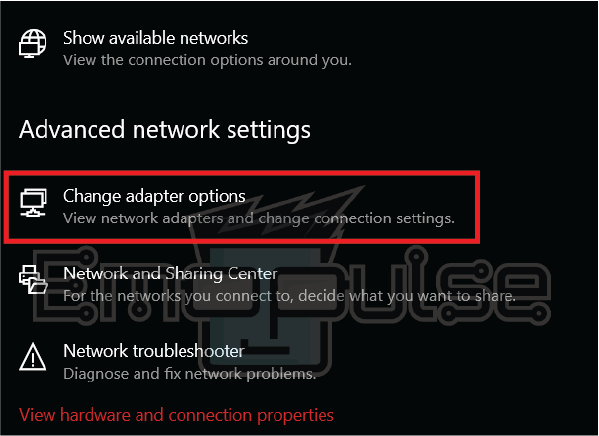
2. Click Change adapter options to view available network connections.
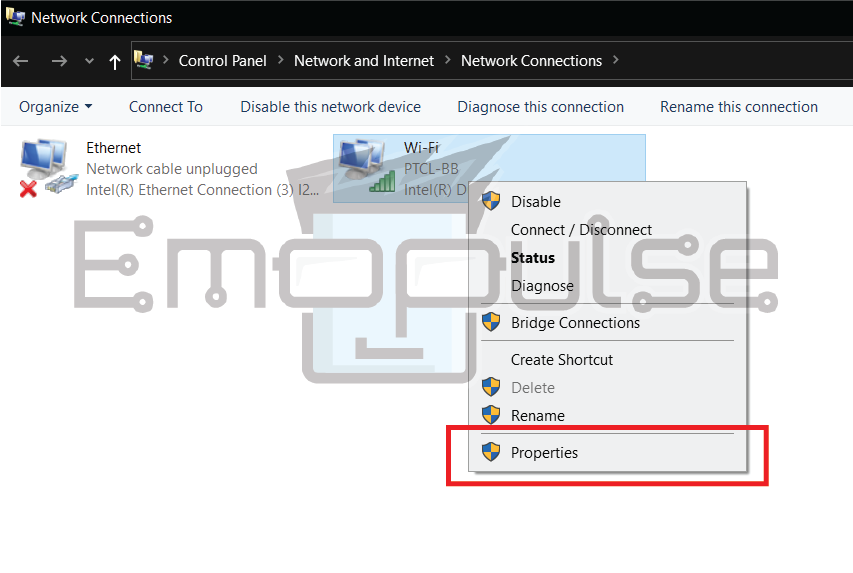
3. Right-click on your active network connection and select Properties.
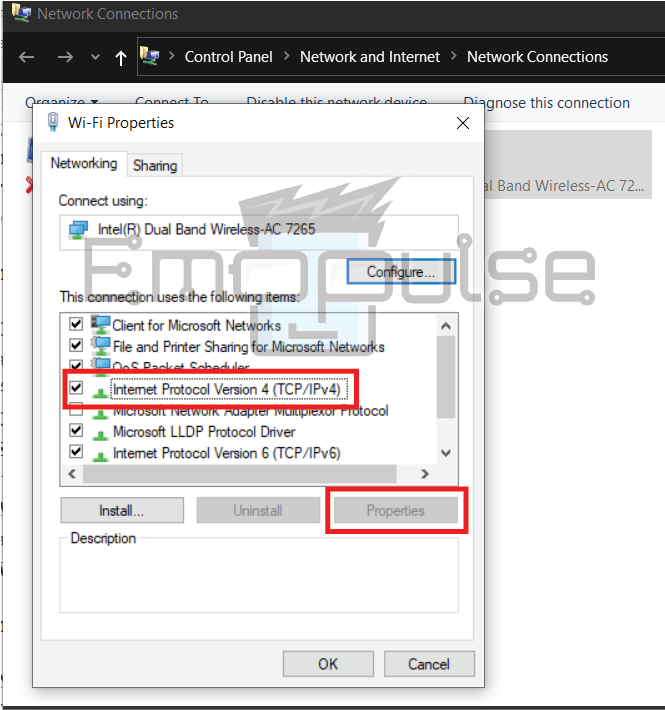
4. Scroll down the list, and select Internet Protocol Version 4 (TCP/IPv4) > Properties.
5. Select Use the following DNS server addresses in the properties window.
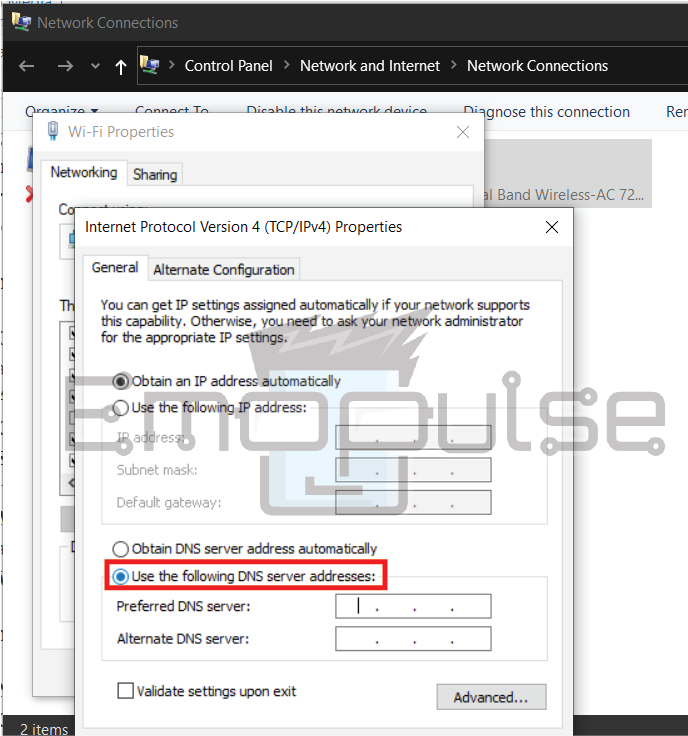
6. Enter the preferred and alternate DNS server addresses (popular options include Google DNS – 8.8.8.8 and 8.8.4.4).
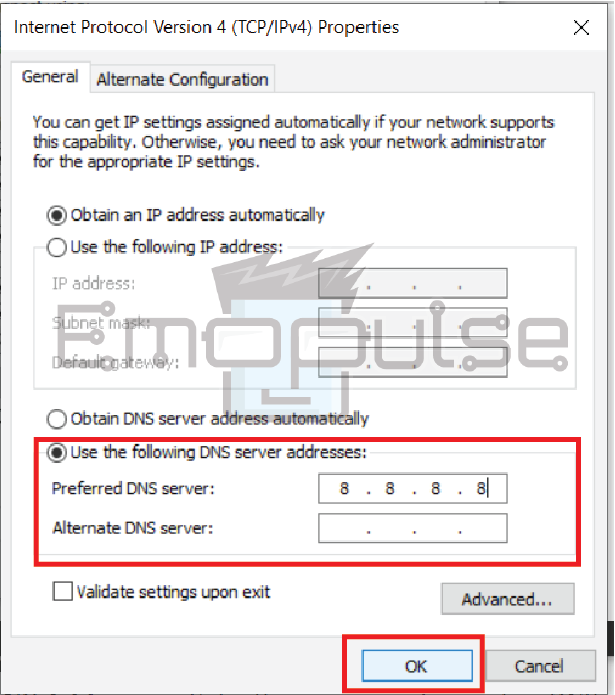
7. Click OK to save the changes. Close the network settings window.
Changing DNS Settings On Xbox:
I recommend following the steps below to change the DNS settings on Xbox:
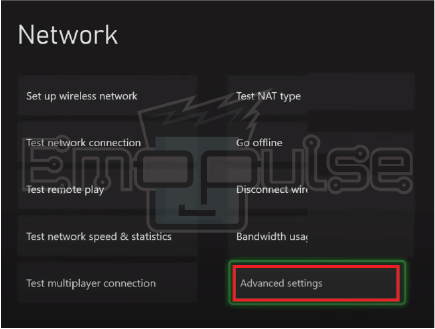
1 On your Xbox, go to Settings > Network > Advanced settings to access more network options.
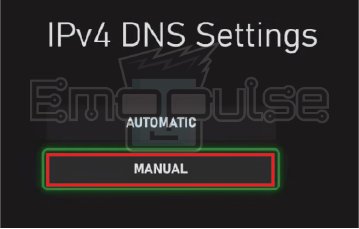
3. Select DNS settings > Manual.
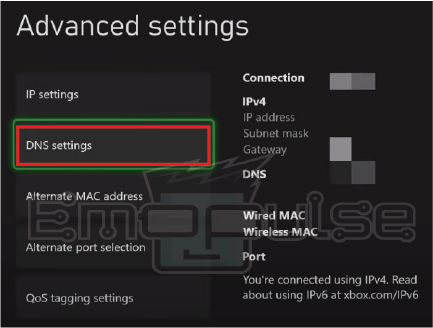
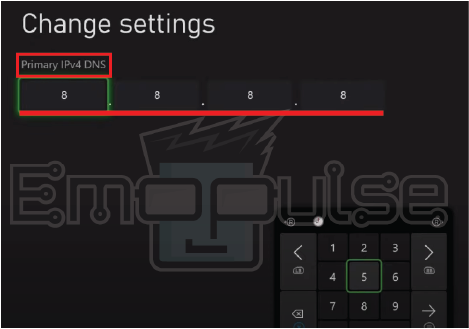
4. Enter the primary and secondary DNS server addresses using the same values you would use on your PC (popular options include Google DNS – 8.8.8.8 for primary and 8.8.4.4 for secondary) OR – Open DNS: Primary DNS (208.67.222.222), Secondary DNS (208.67.220.220).
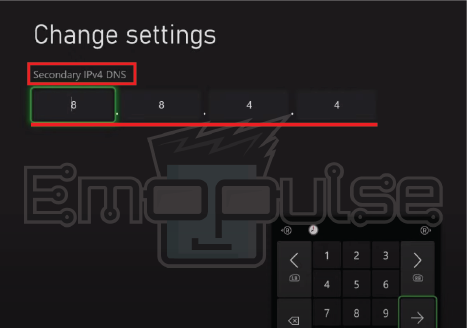
5. After entering the DNS addresses, save your settings and restart your Xbox.
Regional DNS Settings
Every corner of the globe has its unique set of DNS configurations tailored to optimize internet connections and online experiences for that area. Understanding regional DNS settings optimizes your internet experience worldwide. Try checking the public DNS server list.
Final Verdict
DNS, or Domain Name System, is like the internet’s address book, translating human-friendly website names into IP addresses computers can understand.
Errors occur when translations of human-friendly domain names (like www.example.com) to IP addresses (192.168.1.1) fail. This failure can prevent your device from establishing a proper connection to the intended server, resulting in issues like slow loading times, laggy online gaming, and even the inability to access certain websites.
You may also find helpful:
- How To Change DNS Server Settings On PlayStation Consoles
- How To Factory Reset The Xbox
- How To Check Xbox Live Server Status
Frequently Asked Questions
Are there any risks to changing DNS settings?
There are minimal risks, but if you encounter issues, you can always revert to your default settings.
What are the benefits of changing DNS?
Changing DNS can lead to faster and more reliable connections, reducing lag and loading times.
Can I use any DNS addresses I want?
It's recommended to use well known and reputable DNS addresses like Google DNS or Cloudflare DNS to ensure reliability and security.
Good job! Please give your positive feedback
How could we improve this post? Please Help us.