Are you someone looking to upgrade? Or are you someone who was facing lag issues and decided to reinstall Windows and start cleaning? Either way, this guide will give you a step-by-step guide on how I installed Windows 11 and activated it using a product key.
Before you start the process, however, your PC must meet specific minimum requirements to be able to run Windows 11. These include a processor with 1 GHz or faster speed, 2 or more cores, at least 4 GB of RAM, a storage device with a capacity of 64 GB or more, UEFI with Secure Boot support, TPM version 2.0, and a graphics card compatible with DirectX 12 or later with a WDDM 2.0 driver.
How To Install Windows 11
Before you start this process, ensure you have a blank USB flash drive (as all your data in that flash drive will be wiped during the media creation process) with at least 8GB of storage. A stable internet connection is also required for the media creation process. A coworker of mine forgot to empty her flash drive and lost that data. Make sure you are protected from such an incident.
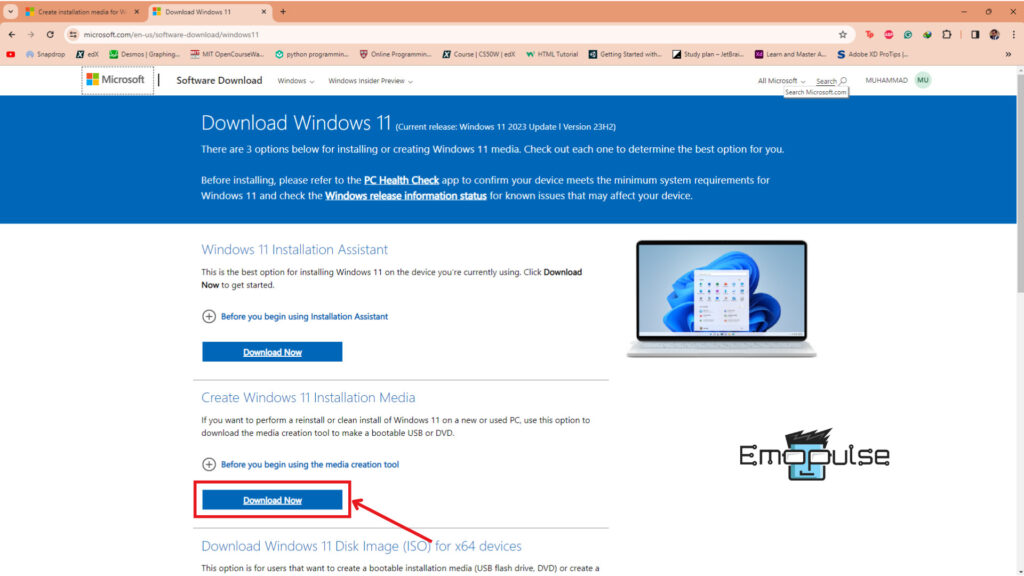
- Download Media Creation Tool: First, download the Windows Media Creation Tool from the official Microsoft store.

Download Windows Installation Media Creation Tool – Image Credits (Emopulse) - Open Media Creation Tool: Once the file is downloaded, open it and accept the ‘Applicable notices and license terms’.
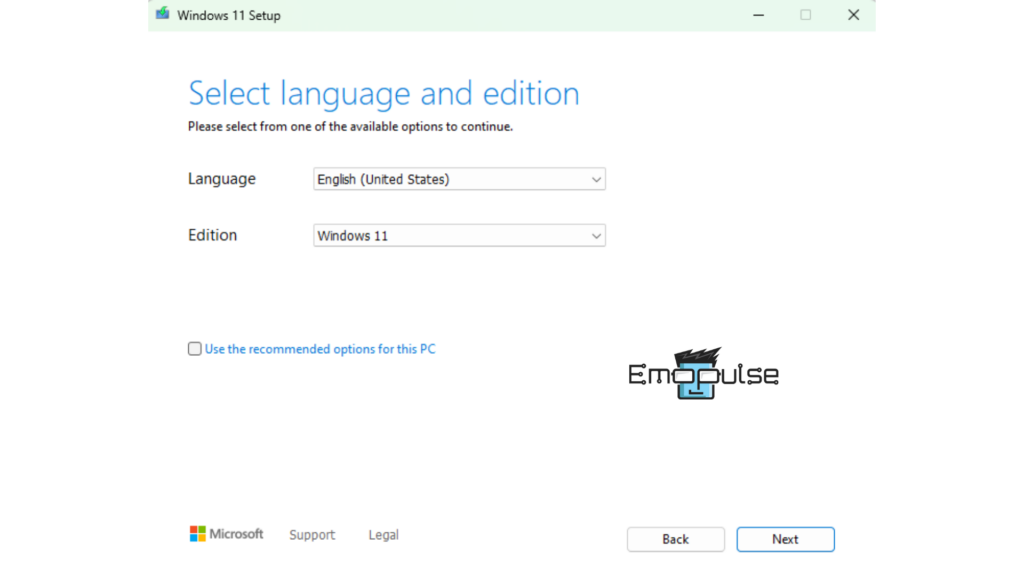
- Selection Windows Edition: After accepting the terms and conditions, you must select the language and Windows edition you want to create an installation media of. Once you select these, click ‘next’.

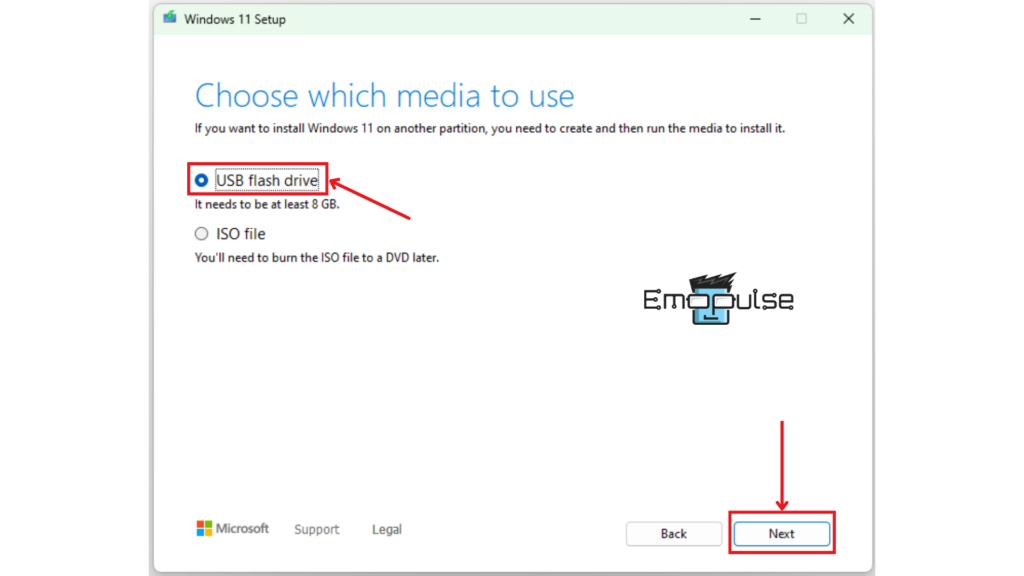
Selection Windows Edition and Language - Select Media: Click on the ‘USB flash drive’ option and click next.

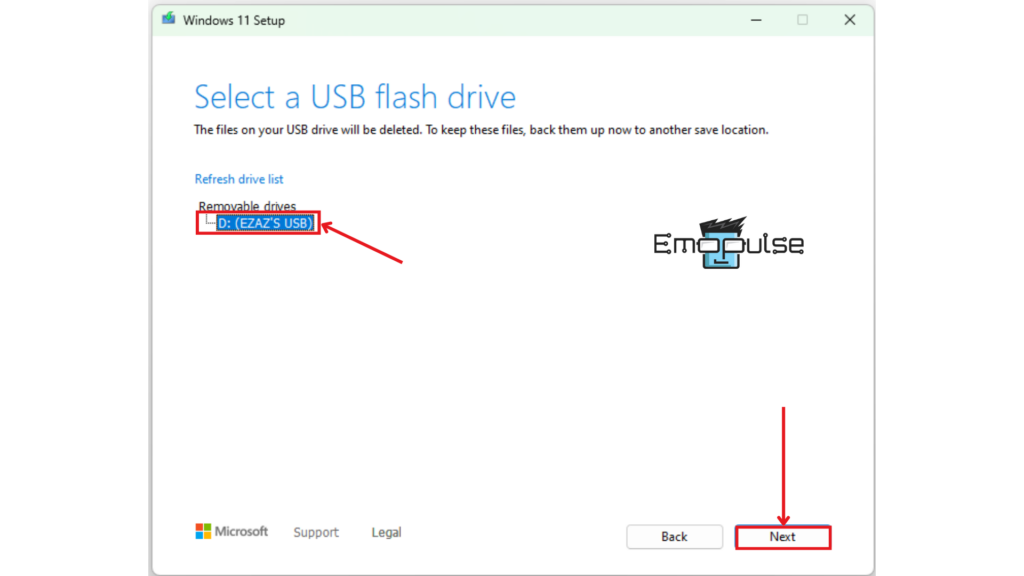
Select Media Type – Image Credits (Emopulse) - Select USB drive: Select the USB drive you want to carry the installation media from the list of plugged-in USB storage devices. Once you hit next, the media creation process will start.

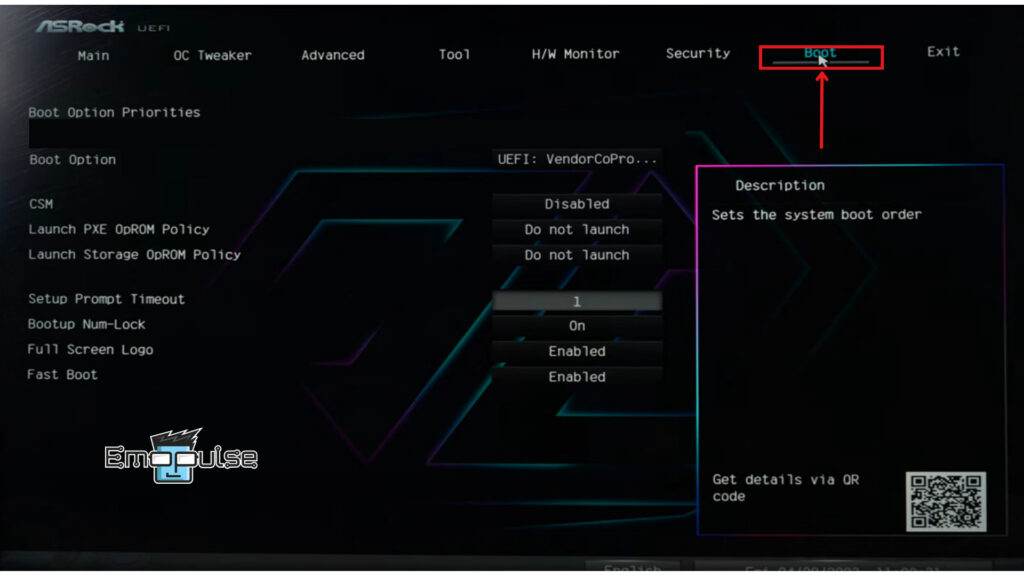
Select the correct USB flash drive – Image Credits (Emopulse) - Boot From USB: Once the media creation process is complete, plug the USB into the computer you want to install Windows 11 on. Press F8, F10, or F12 (depending on your motherboard) to enter BIOS settings. When in BIOS, set your boot order and move the USB flash drive to the top. Next time you restart your PC, the boot files will be loaded from your flash drive.

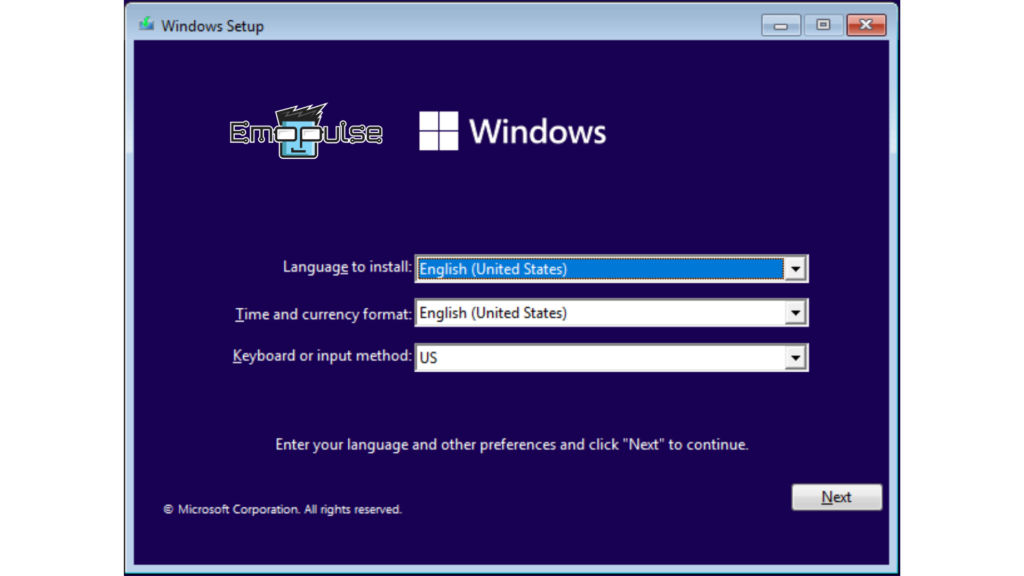
Boot Menu in BIOS – Image Credits (Emopulse) - Windows Setup: Once your PC boots from the USB flash drive, it will ask you to select the ‘Language to install’, ‘Time and currency format’, and ‘Keyboard or Input Method’. You can set these according to your preferences.

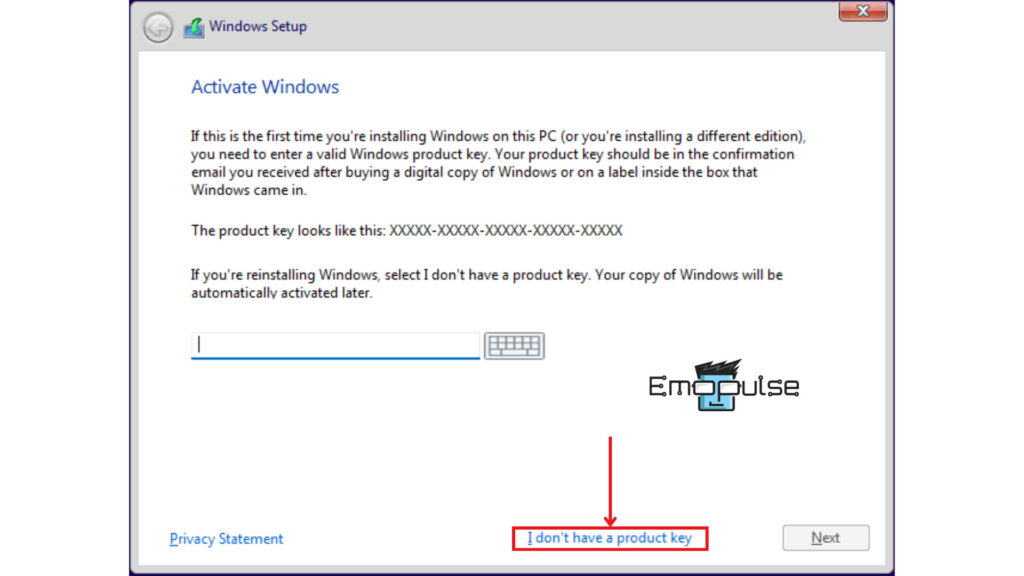
Basic Installation Settings – Image Credits (Emopulse) - Windows Activation Prompt: Windows setup will ask you to activate Windows. You can activate it by entering a valid product key for the edition you are trying to install. If you do not have a product key right now, you can click the ‘I don’t have a product key’ option to activate it later.

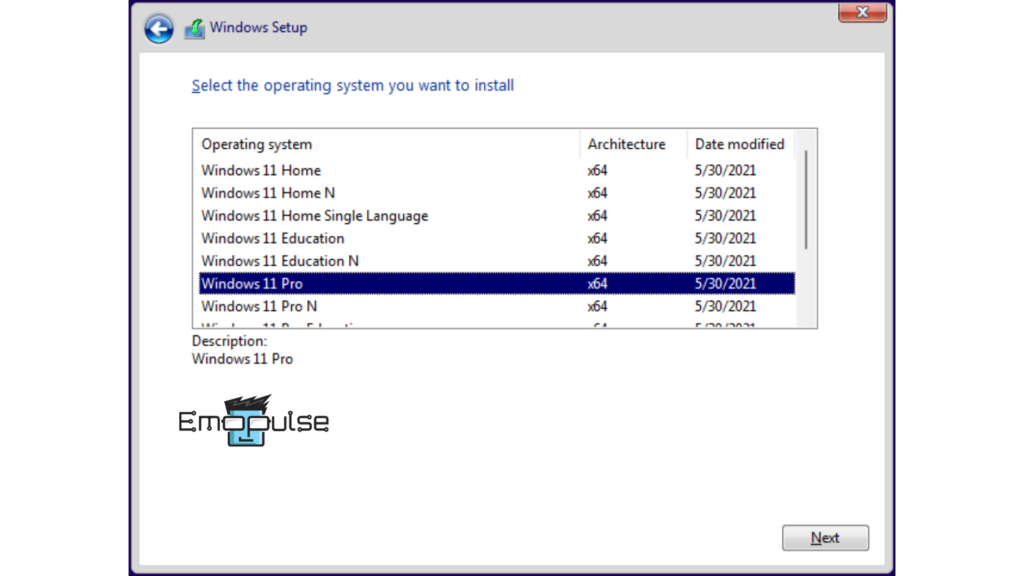
Windows Activation Prompt – Image Credits (Emopulse) - Select Windows Edition: On this screen, you need to select the Windows edition you want to install.

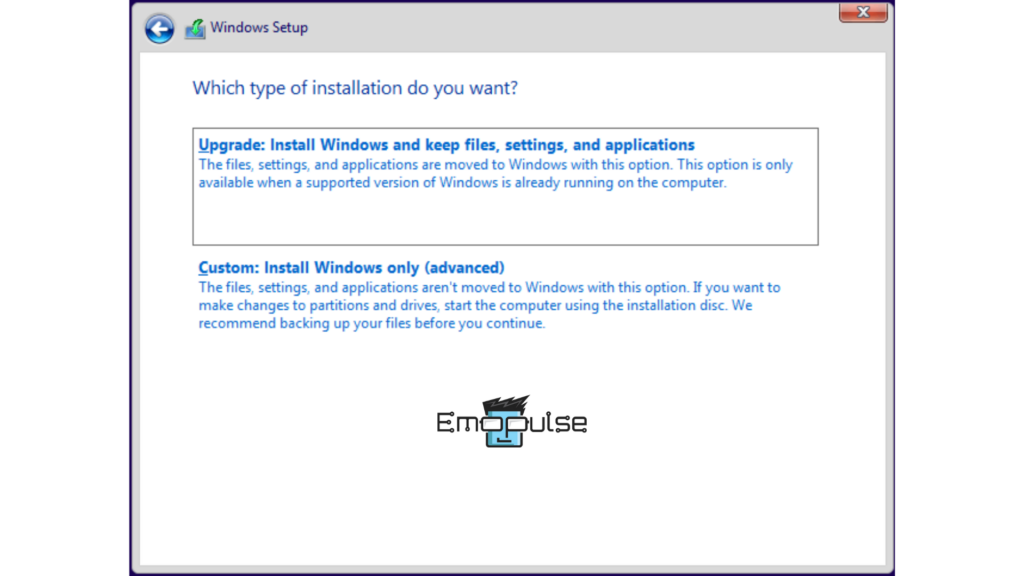
Windows Editions Selection Screen – Image Credits (Emopulse) - Select Installation Type: You can choose whether you want to keep your files or perform a clean install of Windows.

Installation Options – Image Credits (Emopulse) - Select Drive: Choose the drive you want to install Windows 11 on. In this menu, you can also create partitions or format your drives if you want to erase data. Once the drive is selected, the installation process will start.
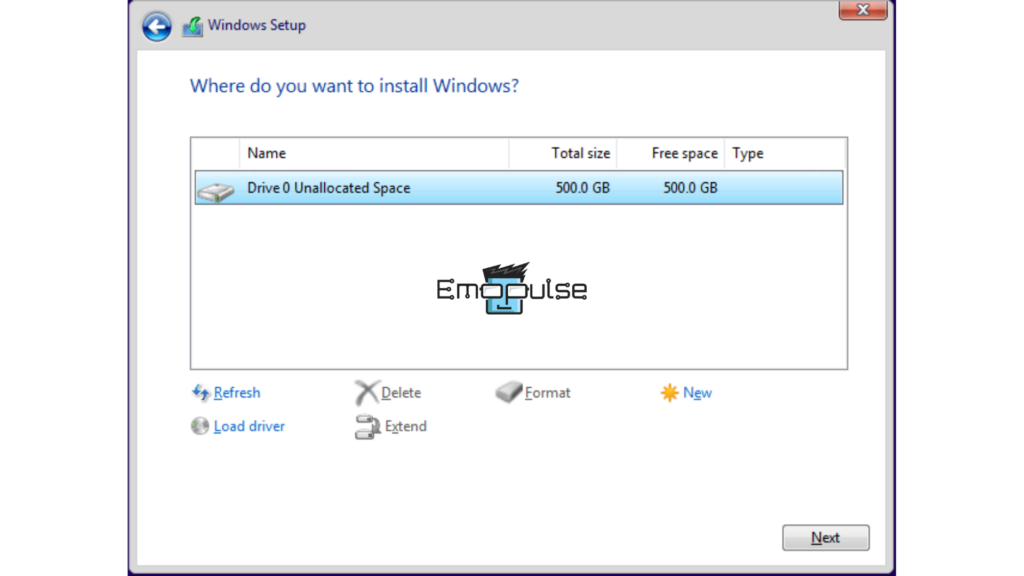
12. Setup For First Use: The installation might take some time to complete, and after it’s done, the Windows logo will appear, and you will be asked to customize some basic settings to get the device ready for your use.
Final Remarks
To conclude, you might want to upgrade to Windows 11 because the support on an older Windows might be ending or because you want to get your hands on the latest and best features (this was my reason for doing so). Installing Windows is easy, just make sure your data is backed up and your system can support the new operating system. The steps outlined above work for others around the globe as well. In case you run into trouble, make sure to reach out to Microsoft for professional assistance.
Check Out My Other Guides On:
- How To Turn Off Efficiency Mode In Windows 11
- How To Fix The Disappearance Of The Wi-Fi Option In Windows 11
- How To Turn Off Microsoft Verified Apps In Windows 11
Frequently Asked Questions
What are the differences between a clean install and an upgrade?
An upgrade preserves your files, settings, and applications, while a clean install wipes the system drive, providing a fresh start. A clean install is recommended for a major version change like Windows 11.
Can I install Windows 11 on an external drive or USB flash drive?
While technically possible, it's not recommended for daily use due to performance limitations. It's better to install Windows 11 on an internal drive for optimal performance.
How to handle driver issues after installing Windows 11?
Windows Update often includes essential drivers, but for specific hardware, consider visiting the manufacturer's website for the latest drivers.
Is internet connectivity required during the Windows 11 installation process?
While not mandatory, having an internet connection is beneficial for receiving the latest updates and drivers during installation. You can install Windows 11 offline, but updates will be needed afterward.
Is it possible to bypass the system requirements for Windows 11 installation?
While workarounds exist, attempting to bypass system requirements can lead to instability, security vulnerabilities, and a suboptimal experience. Microsoft strongly advises against such practices and recommends using compatible hardware for the best performance and security. Bypass attempts may void warranties and Microsoft support, so it's better to upgrade your hardware if needed or continue using a supported Windows version.
Good job! Please give your positive feedback
How could we improve this post? Please Help us.