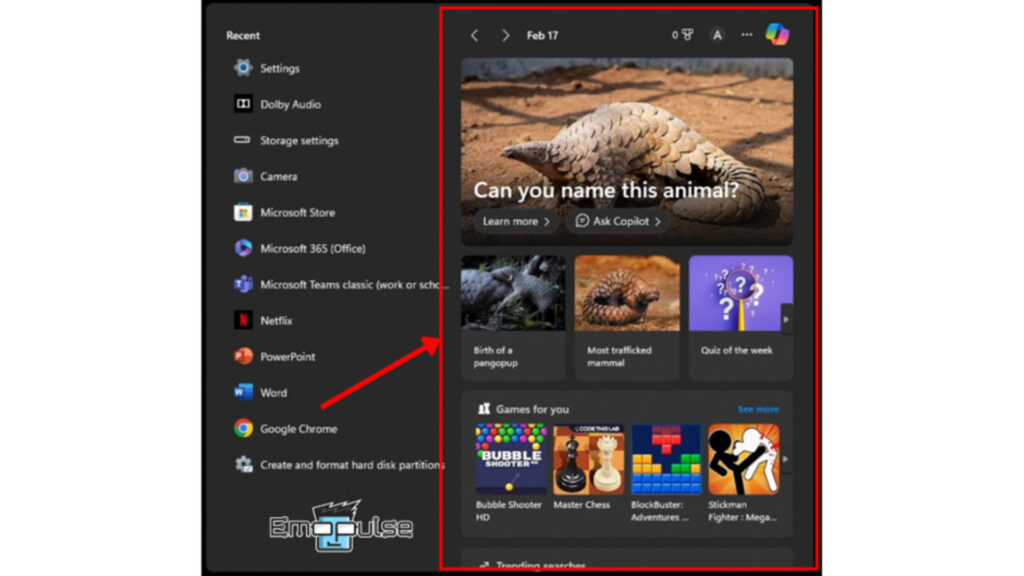
Ever been tired of the endless suggestions that Bing throws at you the moment you click on the Windows button? Or how every search is default taken over by Bing even when you would rather stick to something else? Or that little icon on the taskbar or in the top right corner of the edge that just won’t go away? Well, you are not alone. I once faced the same level of frustration till I decided to do something about it.
Whatever the reason behind Microsoft’s strategy of intensively integrating Bing into Windows 11, the truth of the matter remains the same: you and I do not like being forced to use it. I and the team at Emopulse have spent a lot of time exploring how Bing can be fully removed from Windows 11. I will share the steps you can follow to get rid of Bing completely.
Key Takeaways
- Bing’s intensive integration into Windows 11 means it everywhere: the Windows search, the default search engine, or the sidebar in Microsoft Edge.
- You can go ‘Bing-free’ by changing your privacy settings to remove Bing Cloud Search, your Microsoft search services to change your default browser, and use group policy to turn off Bing Search.
The following are several ways to completely remove Bing from your PC or laptop that operates on Windows 11. I will list down detailed steps for each way; make sure to follow the entire guide to go Bing-free!
Remove Bing Highlights Using Windows Settings
The first thing that we here at Emopulse realized is to change your PC or Laptop’s privacy settings to prevent Bing from giving you endless highlights in Windows search. This solution works well for other users around the globe as well. One solution endorsement can be found on Reddit.
You can follow the following steps to remove the suggestions that Bing throws at you when you click the Windows button:
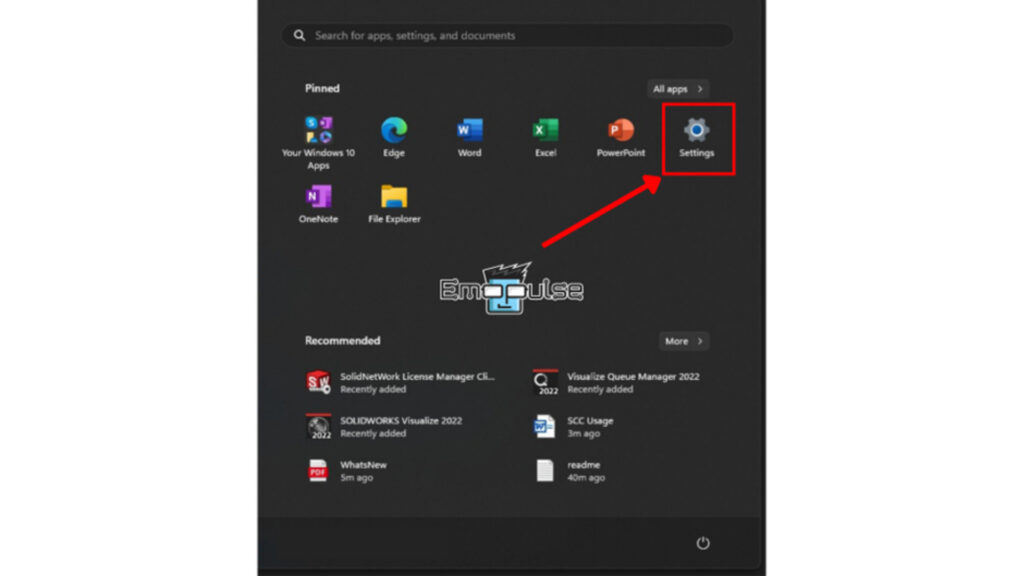
- Open Setting: Go into ‘Settings’ by searching it in the Window’s search bar.
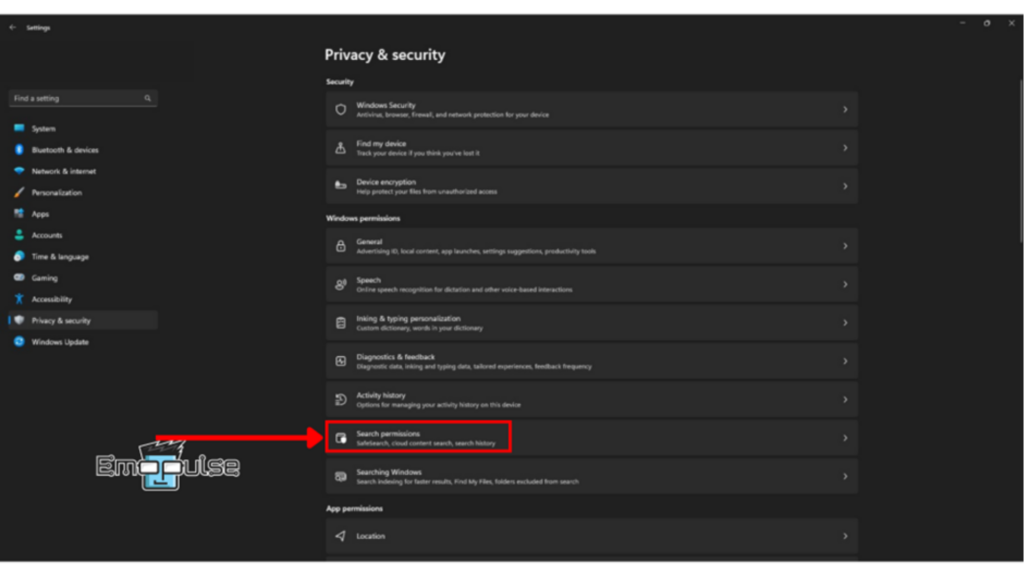
2. Edit Search Permissions: Go into ‘Privacy & Security>Search Permissions’.
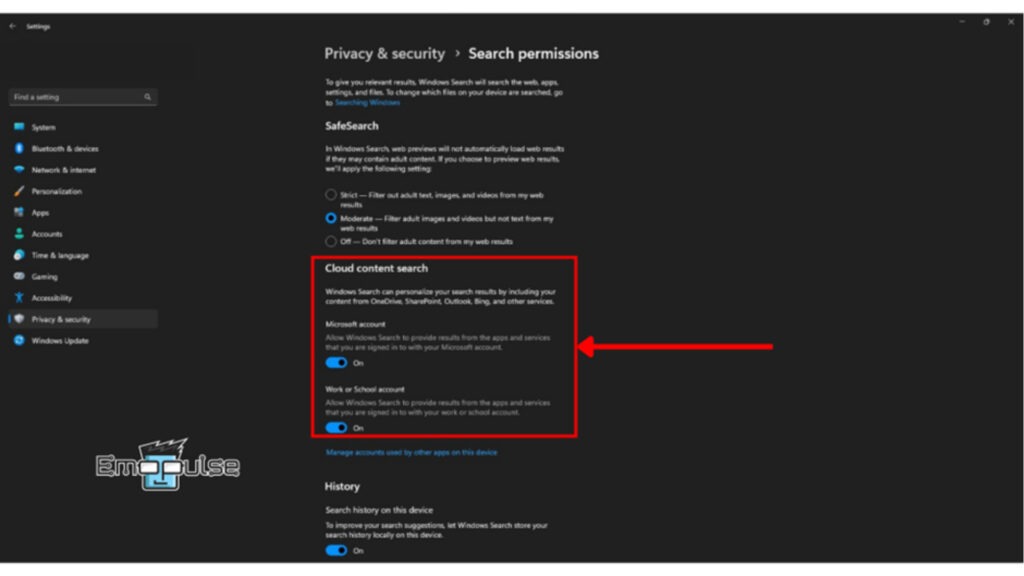
4. Customize Cloud Content Search: Look for the ‘Cloud Content Search‘ and turn it off:
-
- Microsoft account.
- Work or school account.
5. Turn Off Highlights: Scroll down to ‘More Settings’ and turn off ‘Show Search Highlights’
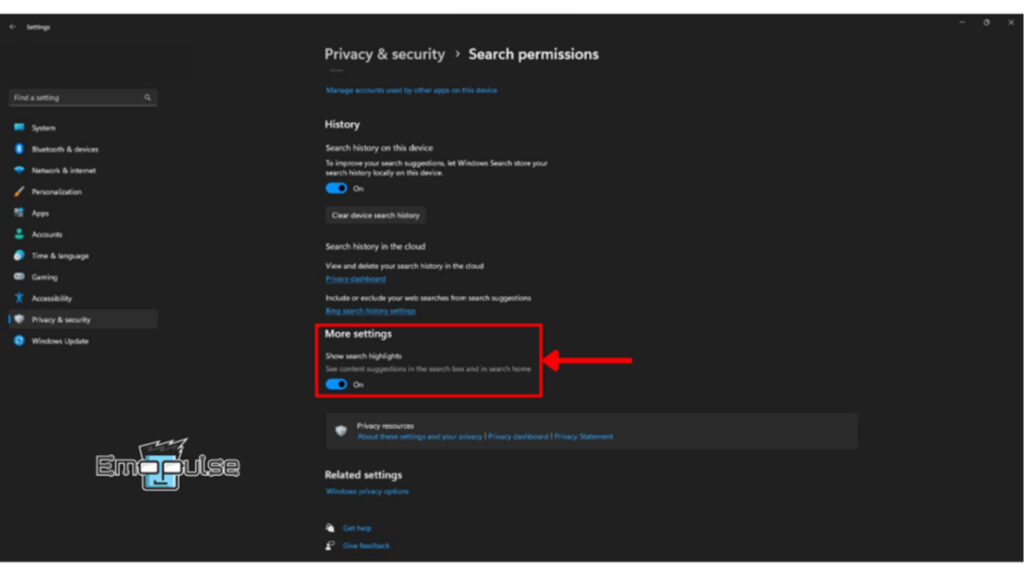
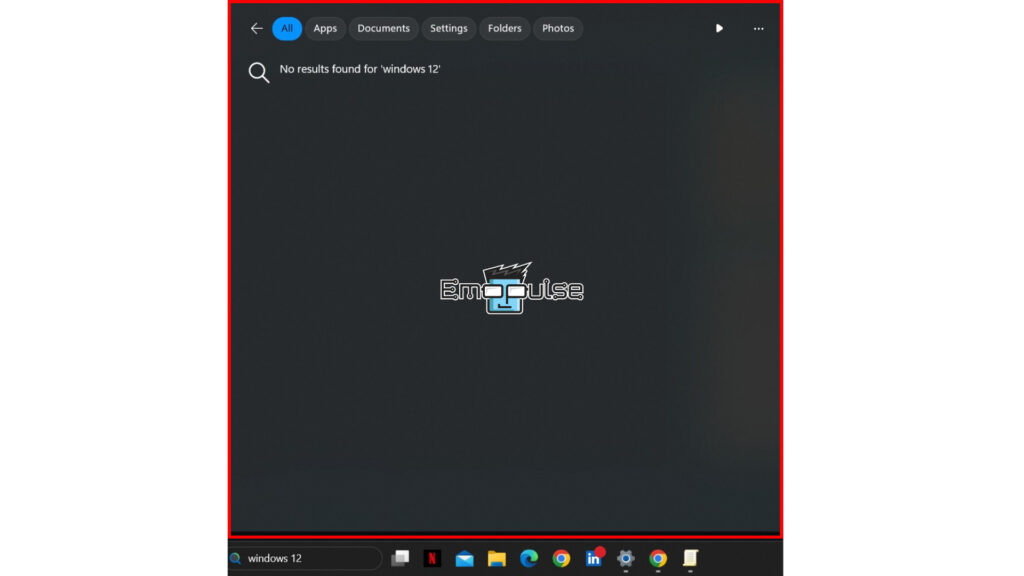
6. Enjoy Bing Free Windows Search: Bing should now be removed from Windows search!
Remove Bing Search From Windows 11 Using Group Policy
The second thing that we here at Emopulse realized is that to completely remove Bing from giving you search results in Windows search is to make edits to the group policy. This solution works well for other users around the globe as well. One endorsement of the solution can be found here.
- Edit Group Policy: Press the Windows key and search for ‘group policy‘. Now, open ‘Edit group policy’.
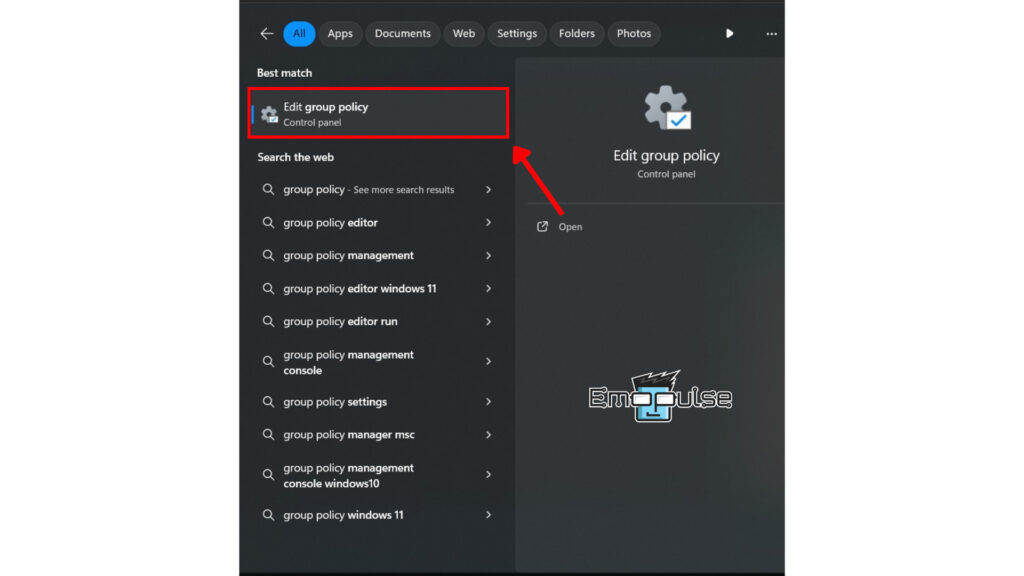
Figure 8 Image Credits (Emopulse)
- Edit User Configuration: Next, under ‘User Configuration‘, move to ‘Administrative Templates> Windows Components > Search’.
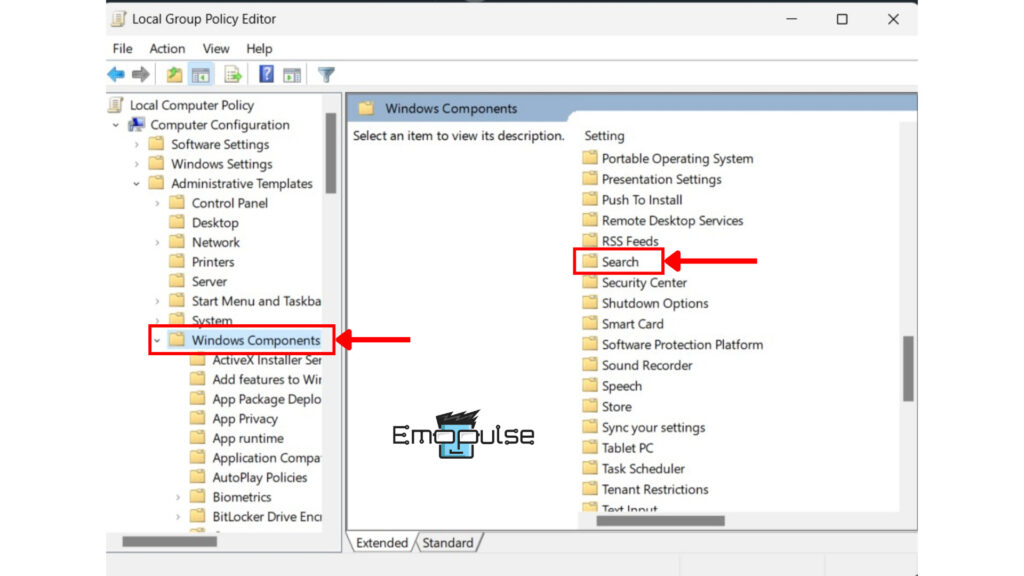
3. Edit Search Settings: Double-click ‘Search’ to open it. Here, look for ‘Do not allow web search’ and ‘Don’t search the web or display web results in Search.’
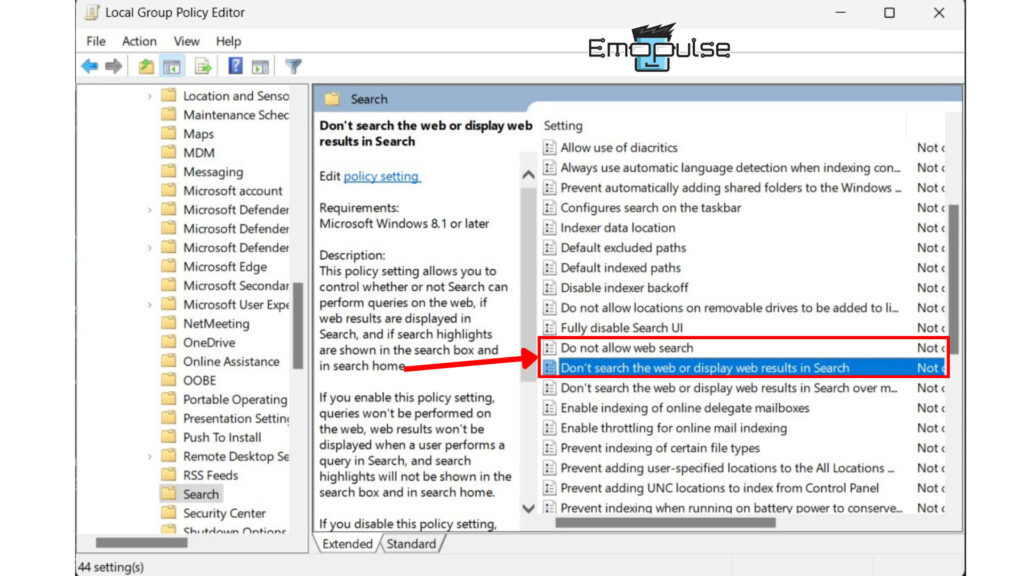
4. Enable The Required Settings: Open the above said settings one by one and enabled them.
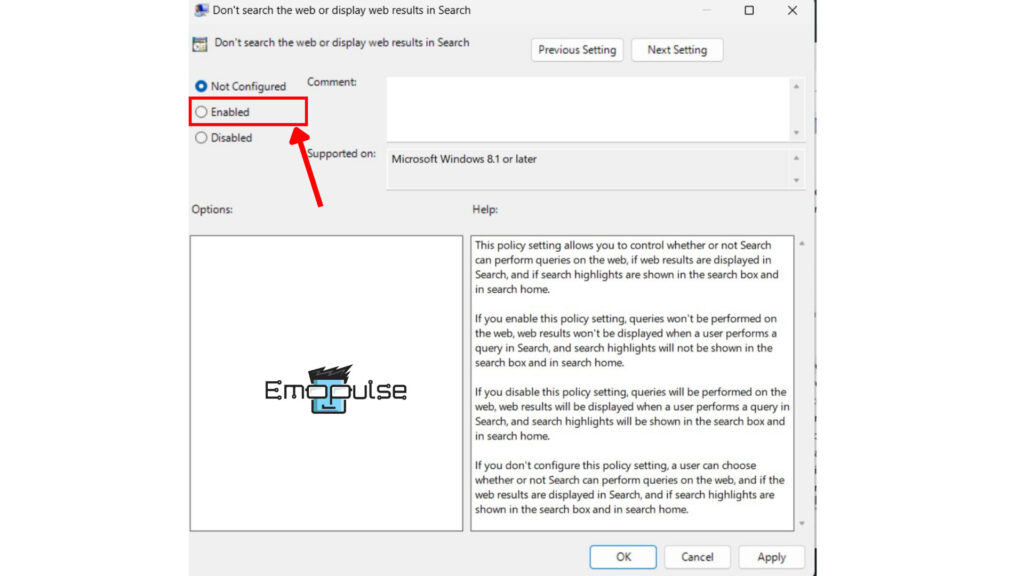
5. Done: This should remove all Bing searches as well!
Remove Edge As The Default Browser
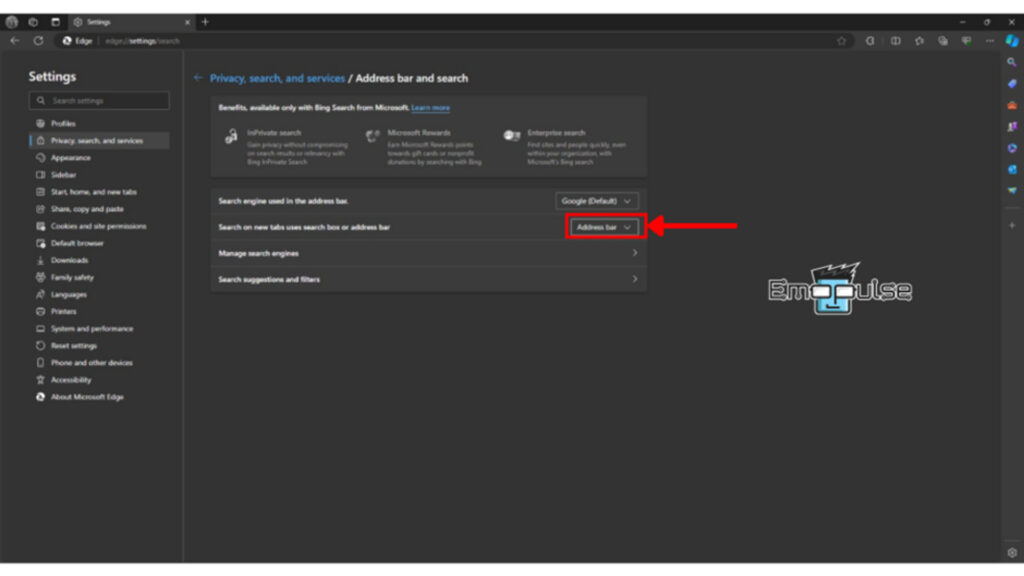
Thirdly, to remove Bing as the default browser on your Windows 11 PC/ Laptop, the fix lies in changing the Search Services from Microsoft. Follow the steps below to change your default browser to Chrome (we choose Chrome for this example; you may choose something else).
- Search Engine Settings In Edge: Open Edge and go to ‘Settings>Privacy Search & Settings>Address Bar & Search’.
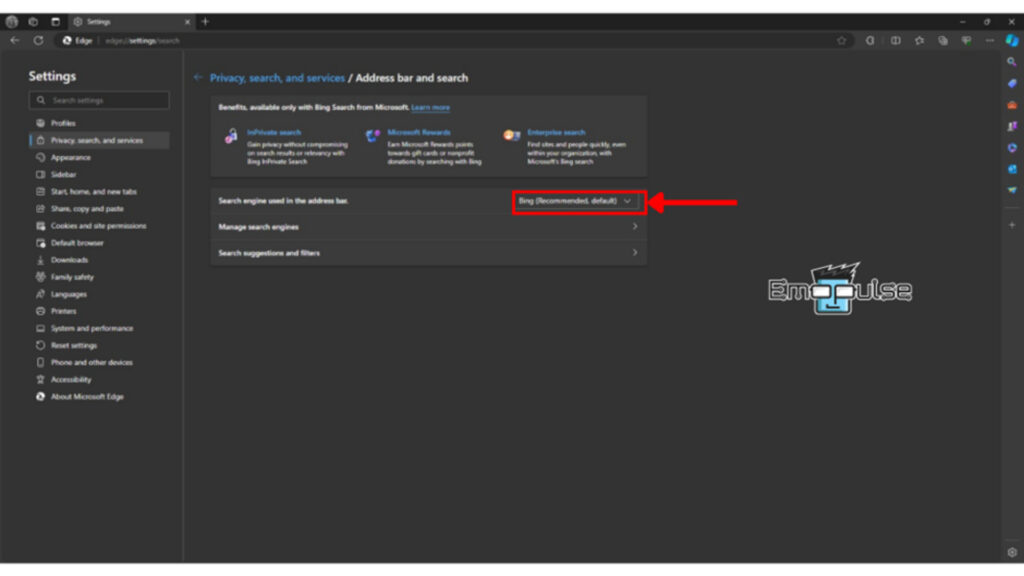
4. Change The Default Browser: Change the ‘Search Engine used in Address Bar’ from the dropdown menu to your preferred one (we chose Chrome).
Final Verdict
As I researched the problem, I realized that people treat Bing as an infestation and badly want to get rid of it. This was evident through this post on the Microsoft forums. Through my experience, I found out that removing Bing from your Windows 11 device is easier than one might think!
Following the steps carefully laid above, make sure to change the privacy settings of your PC, edit the group policy, and then change the search services from Microsoft Edge. All these things would ensure that Bing is removed from the Windows Search and as the default browser as it did for me: You won’t even know it’s there!
If you found this helpful, you might want to read:
- How To Disable Windows Firewall?
- How To Clear Your Browser Cache?
- How To Fix CPU Over Temperature Error?
Frequently Asked Questions
Will removing Bing affect my Windows 11 functionality?
No, removing Bing as the default search engine does not affect the basic functionality of Windows 11. You can still search using other search engines or through the Start menu.
Can I revert back to using Bing as the default search engine if needed?
Yes, you can always revert back to using Bing as the default search engine by adjusting your settings in Windows 11 or your preferred web browser.
Are there any legal implications or terms of service violations associated with removing Bing from Windows 11?
Removing Bing from Windows 11 does not violate any terms of service or legal agreements. Users have the right to customize their operating system to suit their preferences.
Is it possible to completely uninstall Bing from Windows 11?
Completely uninstalling Bing from Windows 11 may not be possible as it is integrated into various aspects of the operating system. However, you can customize the default search engine settings to minimize its presence.
Does removing Bing require a restart of the system or any other specific actions?
Removing Bing from the taskbar search in Windows 11 typically does not require a system restart or any specific actions other than customizing the search engine settings as outlined in the article.
Good job! Please give your positive feedback
How could we improve this post? Please Help us.