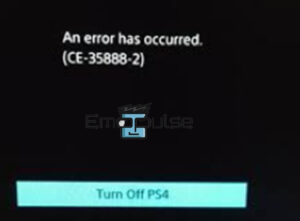
Users of PlayStations reported the Error CS-35888-2 that says something like “Cannot access system storage” or “an error has occurred (CE-35888-2)“. These notifications generally show because of the error code CE-35888-2, and it is due to an issue with a system hard drive or system storage. But there is no need to worry because you will find every feasible solution in this article.
Key Takeaways
- PS4 Error CE-35888-2 is an error code that appears when there is a problem with the system software or the hard drive and hinders all console usage.
- This error can occur when the system software is corrupted, the hard drive is not installed correctly, or the hard drive is damaged.
- To fix the PS4 Error CE-35888-2 issue, check the hard drive connection, rebuild the database in safe mode, or perform a factory reset of your console.
The error is generally related to your hardware. I’d mainly focus on fixes that target your hard drive. Here’s a list of the potential spots:
Checking The Hard Drive Status
In my findings, it’s wise to start by seeing if the hard drive shows up. To check the complex drive status on a PS4, you can follow these steps:
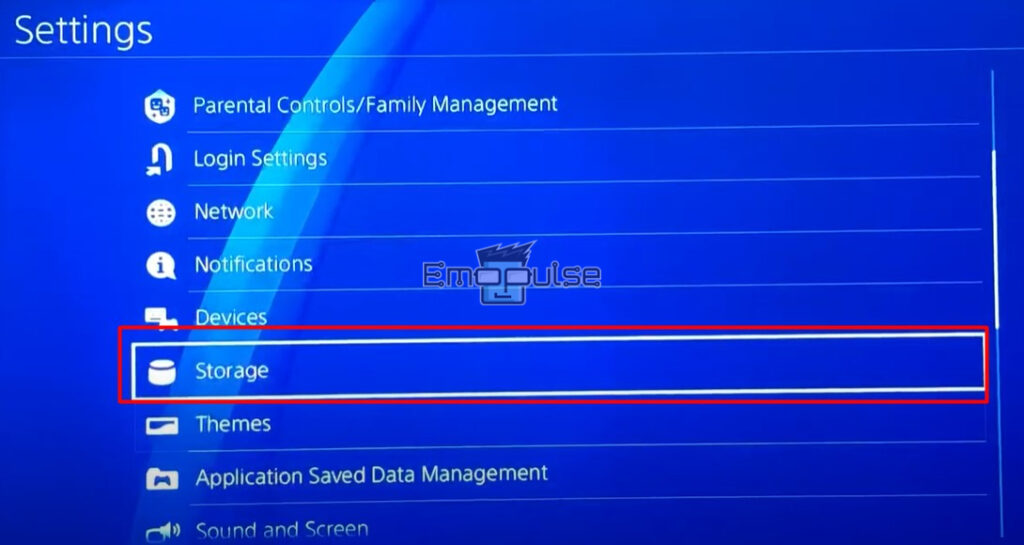
- Turn on your PS4 and go to the home screen.
- Select Settings > Storage.

Storage – Image Credits (Emopulse) - Here, you will see the hard drive’s status, including the amount of free space, the file system, and the complex drive type.
- If the problem persists, the issue lies with your hard drive; it will be necessary to check the connection or format it.
Running A Diagnostic Test
Next, I suggest you utilize the built-in software and run this diagnostic test. If the hard drive fails the test, you may need to replace or repair it. To run a diagnostic test on the hard drive of a PS4, you can follow these steps:
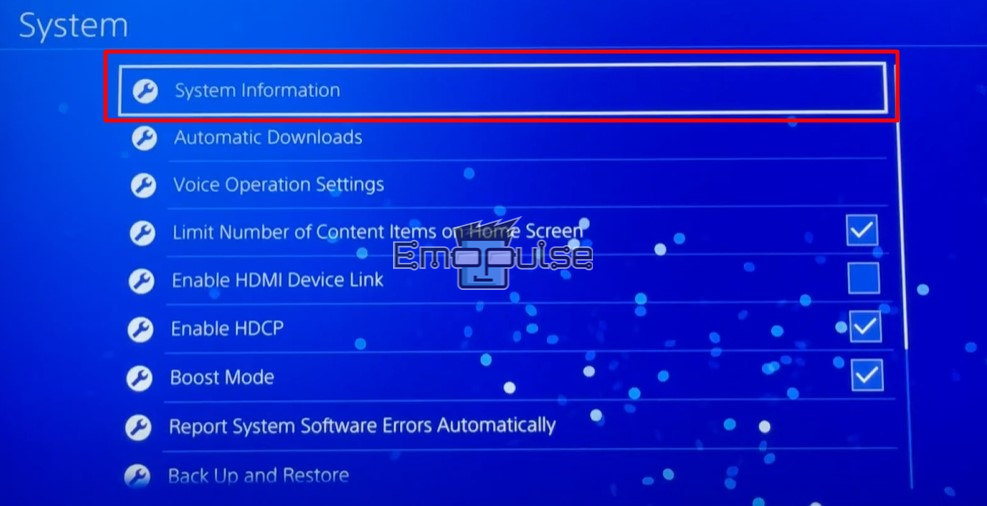
- Turn on your PS4 and go to the home screen.
- Select Settings > System > System Information.

System Information – Image Credits (Emopulse) - You will see the option Test Connections. Select it and follow the on-screen instructions.
- The diagnostic test will check the hard drive for errors and may take a few minutes to complete.
- After the test, you will be presented with the results. If the hard drive will pass the test, you should be able to continue using it without any issues.
It’s important to note that this diagnostic test will check for problematic drive errors, but it may not be able to detect all issues with the hard drive. For that, you can move on to the next fix.
Checking The Hard Drive Connection
Next, I would recommend opening the PS4, but it’s important to note that if you’re uncomfortable opening the PS4, you should contact Sony Support for help. Tampering with the device can void the warranty and damage the device if not done correctly.
If you want to proceed nonetheless, you can follow these steps:
- Turn off your PS4 by holding the power button for at least 7 seconds until the power indicator light turns off.
- Unplug all cables from the PS4, including the power cable, HDMI cable, and any other wires that may be connected.
- Open the PS4 by removing the screws on the bottom of the unit and lifting off the top cover.
- Locate the hard drive; it should be a 2.5-inch hard drive. Ensure it is correctly seated in the hard drive bay and the connectors are securely attached.
- Replace the cover and screws, then reconnect all cables to the PS4.
- Turn on your PS4 and check the complex drive status; you can check it by going to the PS4’s settings menu and selecting Storage.
- It will be necessary to format the hard drive or try another one if the problem persists.
Rebuilding Database In Safe Mode
In my testing, rebuilding the database is a potential fix for this error. It will not affect your saved games or other data, but it will improve the performance of your PS4. This process can help fix issues with the system software and can also be used to fix problems with the hard drive.
Factory Reset
One of my team members also fixed his error by factory resetting the console. It’s important to note that factory resetting the PS4 will erase all data on the hard drive, including all games, saved data, and personal settings. It is recommended to back up your data before initialization using an external hard drive or cloud storage.
Swapping The Hard Drive
When I encountered this error, swapping the hard drive resolved the error for me. So, if wiping out all possible data didn’t help, you’d have to look for new hardware. The PS4 uses a 2.5-inch Serial ATA (SATA) hard drive between 5400 and 7200 RPM with a storage capacity between 250GB and 8TB. It must also be explicitly formatted, which the PS4 can do during the initial setup.
If you’re using a non-original drive, it’s possible that it does not meet the technical specifications required by the PS4. Using the original hard drive from Sony or a well-known brand you know will be compatible with the PS4 will most likely fix the issue.
Final Verdict
The use of non-original drives can also cause CE-35888-2 errors. So, if you tried all the methods mentioned above and are still facing the error, and you’re using a non-original drive, it’s possible that it does not meet the technical specifications required by the PS4. Using the original hard drive from Sony or a well-known brand you know will be compatible with the PS4 will most likely fix the issue.
Here’s a list of other articles that can help you start this diagnosis:
The PS4 Error CE-35888-2 prevents any use of the console and is a result of a problem with the system software or hard disc. This issue can happen when the hard disc is damaged, the system software is defective, or the hard drive is improperly installed. The error message usually suggests that the user should rebuild the database or initialize the PS4 system, which will erase all of the data on the hard drive. Frequently Asked Questions
What is PS4 Error CE-35888-2?
Why does the PS4 Error CE-35888-2 occur?
How do I fix the PS4 Error CE-35888-2?
Good job! Please give your positive feedback
How could we improve this post? Please Help us.