Xbox One Error Code 0x807a1007 [11 Easy Fixes]

The annoying error not letting you play your games, caused by network issues finally put to rest.

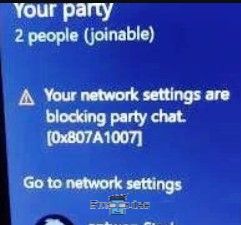
Facing Xbox One Error Code 0x807a1007 can be confusing, as it means you’re having trouble getting on Xbox Live or using some content. This tricky error happens because of problems with your network, license issues, account details, or when Xbox Live has a glitch. In this article, I’ll take you as we explore this problem together and find smart ways to fix it.

Xbox 0x807A1007
Xbox 0x807A1007 -(Image Credits: Emopulse)

Key Takeaways

  • The error code does not let you join a voice party, leaving you unable to talk to your friends while you play.
  • The error code indicates issues with Xbox Live services or accessing content, often related to digital purchases, content licenses, or network connectivity.
  • Following the diagnosis, the planned fixes include power cycling, network check, server status verification, download retry, system update, cache clearing, licensing check, account verification, DNS change, NAT settings adjustment, VPN removal, and port forwarding.

Why Does The Xbox One Error Code 0x807a1007?

This arises when issues affect accessing content or services on Xbox Live. Here are the key reasons:

  • Network instability.
  • Licensing errors.
  • Account configuration issues.
  • Xbox Live service interruptions.

How Do You Fix The Xbox One Error Code 0x807a1007?

Now that the diagnosis has been made, I will move on to the fixes. Here’s a list of what I’m going to be following:

  1. Power Cycle
  2. Check Network
  3. Check Server Status
  4. Update System
  5. Clear Cache
  6. Licensing Check
  7. Account Verification
  8. Change DNS
  9. Change The NAT Settings
  10. Remove VPN
  11. Change The Region

Power Cycle

Power cycling the console can help resolve the error by clearing temporary glitches and refreshing network connections. When you power cycle, you fully restart the console and remove any potential errors or conflicts that might be causing the issue.

Check Out:

Restart Router

Restarting the router can assist in resolving the error by addressing potential network-related problems. Restarting the router clears the cache, resets connections, and assigns new IP addresses to devices. This can eliminate network congestion, resolve connectivity issues, and provide a fresh link to Xbox Live services.

Check Out:

Check Server Status

Checking the server status can aid in addressing this by providing insight into whether the issue is widespread or specific to your console. If the server status indicates a service outage or maintenance, the error may not be due to a problem on your end.

Check Out:

Update System

Updating the system can help resolve the issue by addressing potential bugs, glitches, or compatibility problems within the console’s operating software. Updates often include improvements, bug fixes, and optimizations that can impact the system’s overall performance and ability to connect to online services.

Check Out:

Clear Cache

Clearing the cache can assist in resolving the issue by eliminating temporary files and data that might be causing conflicts or hindering proper system functioning. Over time, cache files can accumulate and potentially lead to errors, including connectivity issues or glitches when accessing online services.

Check Out:

Licensing Check

Performing a licensing check can aid in resolving the issue by ensuring that the proper permissions and licenses are in place for the content you’re trying to access. Errors can occur if permits have expired, an issue with the account associated with the content, or if the content was purchased using a different account. Here are the steps for performing a licensing check on the Xbox One:

  1. Sign in to your Xbox Live account.
  2. Press the Xbox button to open the guide.
  3. Go to “Profile & System” and select “Settings.”
  4. Choose “Account.”
    Account
    Account – Image Credits [Emopulse]
  5. Check “Subscriptions” or “Purchases” for relevant information.
    Subscriptions
    Subscriptions – Image Credits [Emopulse]
  6. Verify content association and license status.
  7. Check expiry or renewal dates for subscriptions.
  8. Restart your Xbox console to apply changes if needed.

Account Verification

Account verification helps by confirming accurate account details, sign-in information, and security settings. Ensuring your account is correctly configured minimizes the possibility of encountering connectivity issues or restrictions when accessing content or services. Here’s how to do this:

  1. Sign into Xbox Live.
  2. Open “Settings.”
  3. Select “Account.”
    Account
    Account – Image Credits [Emopulse]
  4. Verify security settings.
    Security Settings
    Security Settings – Image Credits [Emopulse]
  5. Check privacy preferences.
  6. Confirm sign-in details.
  7. Review recovery information.
  8. Save changes.
  9. Restart the console.

Change DNS

Changing the DNS (Domain Name System) settings can aid in resolving the issue by potentially improving the connection between your Xbox and the internet. Here’s how to change your DNS on the Xbox:

  1. Press the Xbox button.
  2. Go to “Profile & System.”
  3. Select “Settings.”SettingsSettings (Image Credits: Emopulse)
  4. Choose “Network.”
  5. Pick “Network Settings.”Network SettingsNetwork Settings (Image Credits: Emopulse)
  6. Select “IPv4 DNS settings.”
    IPv4 DNS
    IPv4 DNS (Image Credits: Emopulse)
  7. Opt for “Manual.”
  8. Enter primary and secondary DNS (Usually, this is 1.1.1.1).
    1.1.1.1
    1.1.1.1 (Image Credits: Emopulse)
  9. Save settings.
  10. Restart Xbox.

Change The NAT Settings

Changing the NAT (Network Address Translation) settings can help resolve the issue by improving the communication between your Xbox and the internet. NAT settings affect how devices on your network connect to online services. If NAT is restricted or strict, it can cause connectivity problems and impact content access.

To change NAT settings on Xbox One:

  1. Press the Xbox button.
  2. Go to “Profile & System.”
  3. Go to “Settings.”
  4. Select “Network.”
    Network Settings
    Network Settings – Image Credits [Emopulse]
  5. Choose “Test NAT type.”
    Test NAT Type
    Test NAT Type – Image Credits [Emopulse]
  6. Access the router via a web browser.
  7. Go to “NAT Forwarding.”
    UnPnP
    UnPnP – Image Credits [Emopulse]
  8. Turn on UPnP.
  9. Test NAT type again.

Remove VPN

Removing the VPN (Virtual Private Network) can assist in resolving the issue by restoring your regular network configuration. VPNs encrypt and reroute internet traffic, sometimes conflicting with online gaming services. By disconnecting the VPN, you revert to your original connection, potentially eliminating any connectivity disruptions caused by VPN-related conflicts.

To remove a VPN on Xbox One:

  1. Press the Xbox button.
  2. Go to “Profile & System.”
  3. Move to “Settings.”
    Settings
    Settings (Image Credits: Emopulse)
  4. Select “Network.”
    Network Settings
    Network Settings (Image Credits: Emopulse)
  5. Pick “Advanced settings.”
  6. Choose “IPv4 DNS settings.”IPv4 DNSIPv4 DNS (Image Credits: Emopulse)
  7. Opt for “Manual.”
    1.1.1.1
    1.1.1.1 (Image Credits: Emopulse)
  8. Delete VPN configurations.
  9. Save settings.
  10. Restart Xbox.

Change The Region

Changing the region can help resolve the issue by potentially accessing different servers or services that might have a more stable connection. Sometimes, certain areas might experience server or network problems, leading to errors like yours.

To change the region on Xbox One:

  1. Press the Xbox button.
  2. Go to “Profile & System.”
  3. Next, go to “Settings.”
  4. Choose “System.”
  5. Select “Language & location.”
    Language And Location
    Language And Location (Image Credits: Emopulse)
  6. Change location.
  7. Restart Xbox.

What To Do If None Of The Fixes Work?

If none of the fixes mentioned earlier resolve the issue you’re experiencing on Xbox, consider the following steps:

  1. Double-Check Steps: Ensure you’ve correctly followed each troubleshooting step. Sometimes a tiny oversight can cause the problem to persist.
  2. Wait and Retry: In some cases, the issue might be temporary. Wait for a while, and then try the same action again.
  3. Check Xbox Support: Visit the Xbox Support website or contact customer support. They might have specific recommendations for your situation.
  4. Community Forums: Check Xbox community forums. Others might have experienced and resolved similar issues; their insights could help you.
  5. Professional Help: If the problem persists, consider seeking professional help from a technician or an Xbox repair centre.

Remember that error codes and issues can sometimes be complex and multifaceted, and solutions might not always be straightforward. Patience and persistence are vital while troubleshooting technical problems.

If this guide was of any help be sure to check out these too:

Frequently Asked Questions

Why Is Xbox Not Accepting My Credit Card?

Xbox might not be accepting your credit card due to incorrect details, expired card, region mismatch, or payment restrictions.

Why Does My Xbox Say I Don't Own a Game?

Your Xbox might indicate that you don't own a game due to issues with licenses, account synchronisation, or the game not being properly purchased or downloaded.

Does Xbox Accept Debit Cards?

Yes, Xbox generally accepts debit cards for purchases, as long as they are enabled for online transactions and meet the required criteria.

Was this helpful?

Good job! Please give your positive feedback

How could we improve this post? Please Help us.